Create a Revit project
Before starting to create a project, read the model requirements
You can also read the video tutorial
Creating a Revit project
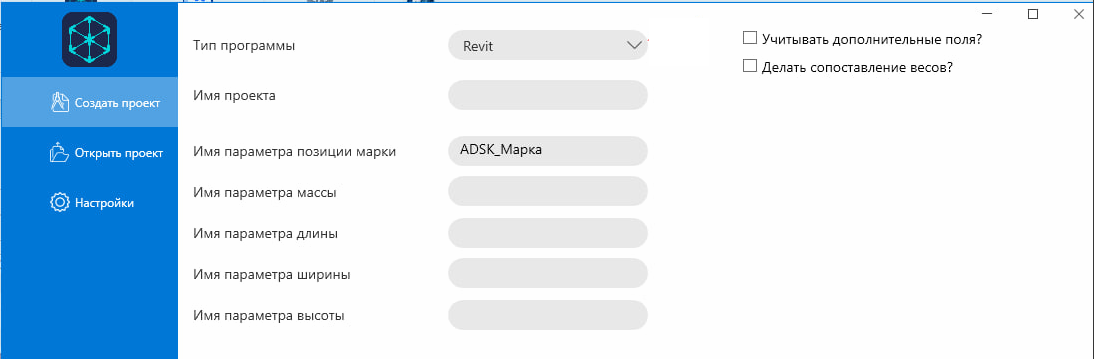
- In the Program Type drop-down list, select Revit.
- Specify the project name.
- Specify the name of the parameter to be used as the brand position (by default, for example,
adsk_mark). If you need to use multiple parameters, add = to the beginning and put a + sign between the values. - If necessary, fill in the names of the parameters for:
- mass;
- lengths;
- width;
- heights.
These parameters are used to correctly match the model data on the server.
- Set additional options:
- Consider additional fields? — if you want to include user parameters in the upload.
- Do the weights match? — if it is necessary to compare the masses of the model elements.
- After filling in all the fields, click **Create **.
- Perform weight matching if necessary.
- Add additional fields if necessary.
Notes
- Before creating a project, make sure that all the specified parameters actually exist in your Revit model.
- If the parameters are not filled in, the upload may contain incomplete data.
- Using additional fields and matching weights can increase the processing time of the project.